SwiftUI is a user interface toolkit, created by Apple, that helps you to build stunning apps across all Apple devices. QuickBlox iOS SDK is a ready-to-use software development kit that enables you to integrate chat and video calling functionality into any app. The QuickBlox SDK comes with detailed documentation and chat and video code samples, so that you can add real-time communication features easily to your app. The following tutorial explains how you can connect the QuickBlox iOS SDK to your latest SwiftUI project.
Learn more about, The iOS Chat Sample from QuickBlox
QuickBlox SwiftUI tutorial Series:
Step 1: Set-up App Credentials in QuickBlox Account
To get started with the QuickBlox IOS SDK, you first need to Login on the homepage of the QuickBlox dashboard. If you don’t yet have an account, sign-up for a free account now.
- Once logged in, create a new project by selecting the “New app” button.
- To configure the app, provide relevant information in the corresponding fields about your organization and select the “Create app” button.
- Make a note of your app’s credentials. On the dashboard select YOUR_APP and “Overview” and copy your Application ID, Authorization Key, Authorization Secret, and Account Key.
Check out our Quick Start documentation for more details.
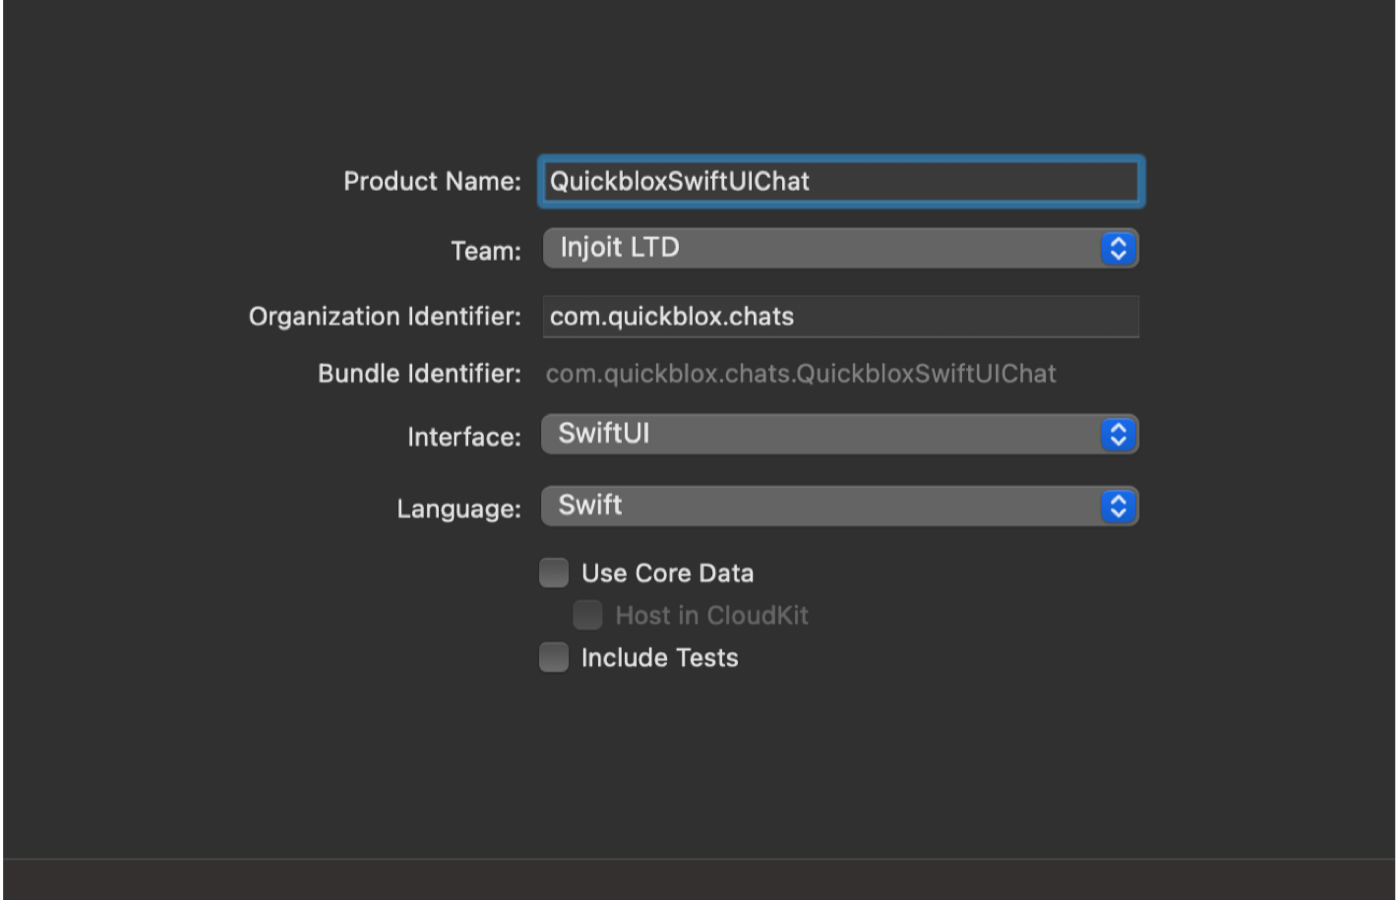
Step 2: Create New Project in Xcode
You’ll use Xcode 14 to develop and test the app.
- Open Xcode 14 and create a new Swift project.
- Choose iOS from the list of platforms.
- Choose the “App” template.
- Use YourProjectNameChat for the project name.
- Select “SwiftUI” as the Interface option.
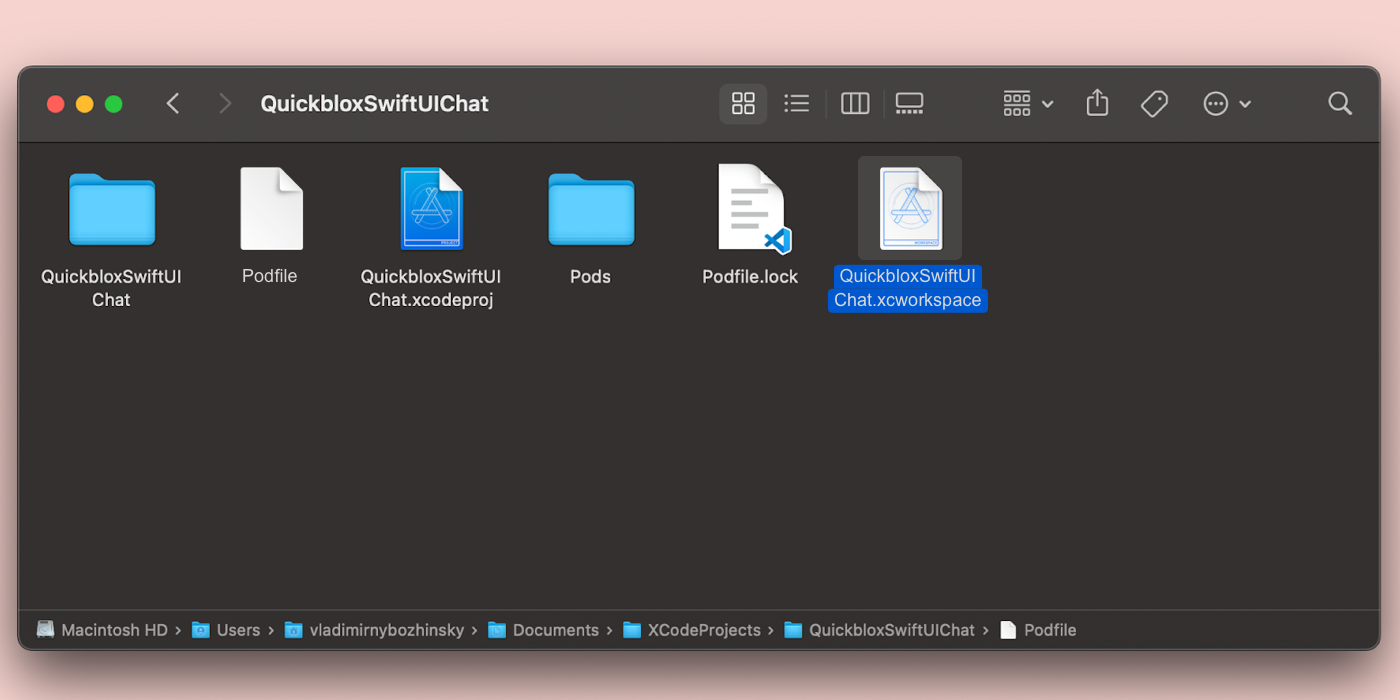
Step 3: Install QuickBlox SDK into your app
For installation of the QuickBlox SDK please follow instructions as detailed in our official documentation.
Please note that CocoaPods first needs to be installed.
Once you’ve installed the iOS SDK, open your project in Xcode by double clicking on the generated CocoaPods file YourProjectNameChat.xcworkspace
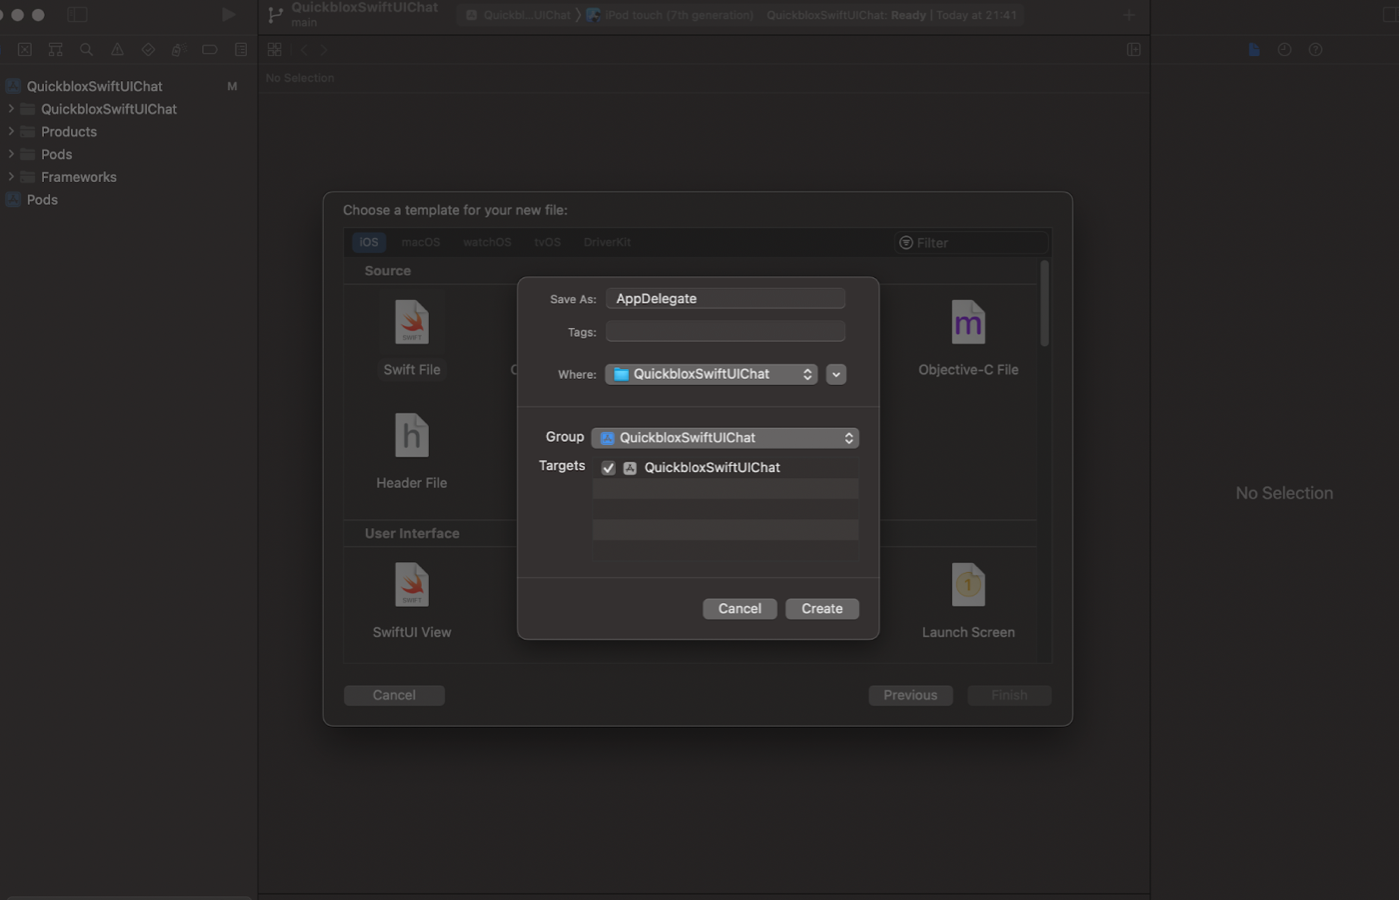
Step 4: Add an AppDelegate to your project
Make the AppDelegate available in your SwiftUI app.
Create a Swift file named AppDelegate which is part of the YourProjectNameChat target.
Step 5: Prepare the AppDelegate
- Add the Quickblox import to the top of the file.
- Paste your app’s credentials to the body of CredentialsConstant. Please review STEP 1 of this tutorial which outlines how to set-up and obtain your app’s credentials in your QuickBlox account.
- Set up Quickblox to work with the following code snippet.
import UIKit
import Quickblox
import SwiftUI

struct CredentialsConstant {
    static let applicationID:UInt = 12345
    static let authKey = "YourAuthKey"
    static let authSecret = "YourAuthSecret"
    static let accountKey = "YourAccountKey"
}

class AppDelegate: NSObject, UIApplicationDelegate {

    func application(_ application: UIApplication,
                     didFinishLaunchingWithOptions launchOptions:
                        [UIApplication.LaunchOptionsKey : Any]? = nil) -> Bool {

        // Set QuickBlox credentials (You must create application in admin.quickblox.com).
        QBSettings.applicationID = CredentialsConstant.applicationID
        QBSettings.authKey = CredentialsConstant.authKey
        QBSettings.authSecret = CredentialsConstant.authSecret
        QBSettings.accountKey = CredentialsConstant.accountKey

        // enabling carbons for chat
        QBSettings.carbonsEnabled = true
        // Enables Quickblox REST API calls debug console output.
        QBSettings.logLevel = .debug
        // Enables detailed XMPP logging in console output.
        QBSettings.enableXMPPLogging()
        QBSettings.disableFileLogging()
        QBSettings.autoReconnectEnabled = true

        return true
    }
}
Step 6: Connect the AppDelegate to the app
In order to connect the AppDelegate to the project, you need to set up the Swift YourProjectNameChat.app file.
Open the Swift file YourProjectNameChatApp and add the Quickblox import to the top of the file.
Change the body of this class as shown below.
import SwiftUI
import Quickblox

@main
struct YourProjectNameChatApp: App {

    @UIApplicationDelegateAdaptor(AppDelegate.self) var appDelegate

    var body: some Scene {
        WindowGroup {
            ContentView()
        }
    }
}
Congratulations!
You’ve successfully connected the QuickBlox iOS SDK to your SwiftUI project. You can now integrate chat and video calling functionality to your app. Read our detailed iOS documentation to learn more.
Learn more about: How to Launch iOS Chat and WebRTC Video conferencing samples
Learn more about: How to Build a Messaging App for iOS and Android with Meteor / Cordova
Have Questions? Need Support?
Join the QuickBlox Developer Discord Community, where you can share ideas, learn about our software, & get support.
Join QuickBlox Discord
 AI Agent — automate conversations and workflows. Now available on Free plan


