If you have been following our series on building a chat app login page with SwiftUI, you will have started to build a login screen from scratch and applied data validation. In this third blog of the series we continue to improve the user interface, connecting the login functionality to the chat server. As part of this process you will need to familiarize yourself with basic authorization methods of the Quickblox iOS chat SDK.
QuickBlox SwiftUI tutorial Series:
Let’s Get Started !
You can download the finished project from the Github repository
QuickBlox iOS SDK and Chat Server
The QuickBlox iOS SDK provides a feature-rich set of modules to build an immersive chat application. Furthermore, using the QuickBlox SDK means you access the powerful QuickBlox chat server which facilitates real-time messaging.
We recommend that you read the Authentication and Chat Connection section in
in Quickblox Documentation before proceeding further.
Every user needs to authenticate with QuickBlox before using any QuickBlox functionality. When someone connects with an application using QuickBlox, the application will need to obtain a session token which provides temporary secure access to QuickBlox APIs. A session token is an opaque string that identifies a user and an application.
Connecting to Chat
First, let’s create a new file named AuthModule.swift with the following content:
import Foundation
import Quickblox

class AuthModule {
    //MARK: - Properties
    func enterToChat(fullName: String,
                     login: String,
                     password: String,
                     completion: @escaping (_ error: Error?) -> Void) {
        signUp(fullName: fullName, login: login, password: password) { error in
            if let error = error {
                completion(error)
                return
            }
            completion(nil)
        }
    }

    private func signUp(fullName: String,
                        login: String,
                        password: String,
                        completion: @escaping (_ error: Error?) -> Void) {
        let newUser = QBUUser()
        newUser.login = login
        newUser.fullName = fullName
        newUser.password = password
        QBRequest.signUp(newUser, successBlock: { response, user in
            self.login(fullName: fullName, login: login, password: password) { error in
                if let error = error {
                    completion(error)
                    return
                }
                completion(nil)
            }
        }, errorBlock: { response in
            if response.status == QBResponseStatusCode.validationFailed {
                // The user with existent login was created earlier
                self.login(fullName: fullName, login: login, password: password) { error in
                    if let error = error {
                        completion(error)
                        return
                    }
                    completion(nil)
                }
            } else {
                completion(response.error?.error)
            }
        })
    }

    private func login(fullName: String,
                       login: String,
                       password: String,
                       completion: @escaping (_ error: Error?) -> Void) {
        QBRequest.logIn(withUserLogin: login,
                        password: password,
                        successBlock: { response, user in
            self.connectToChat(userID: user.id, password: password) { error in
                if let error = error {
                    completion(error)
                    return
                }
                completion(nil)
            }
        }, errorBlock: {  response in
            completion(response.error?.error)
        })
    }

    private func connectToChat(userID: UInt,
                               password: String,
                               completion: @escaping (_ error: Error?) -> Void) {
        QBChat.instance.connect(withUserID: userID,
                                password: password,
                                completion: { error in
            if let error = error,
               error._code != ErrorCode.alreadyConnectedCode,
               error._code != ErrorCode.alreadyConnectingCode {
                completion(error)
                return
            }
            completion(nil)
        })
    }
}
Let’s take a closer look at what the above code does.
1. Calling the enterToChat function that accepts fullName: String, login: String and password: String starts the user authorization process with such data and returns an optional error: Error? – that is, if the user logged in successfully, the error is nil.
2. In the body of the enterToChat method, func signUp(fullName: String, login: String, password: String, completion: @escaping (_ error: Error?) -> Void) is called which calls the Quickblox IOS SDK method: QBRequest.signUp(_ user :QBUUser).
If there is no user with such a login in the server database, then a new user is registered and returned to successBlock and you can make a login for this user.
If there is already a login entered, then an error with code 422 “QBResponseStatusCode.validationFailed” is returned in the errorBlock, which says that there is already a user with such a login and you can try to Log in with this user.
In the case of unsuccessful user creation, you will get an error in the errorBlock and you will return it and finish the login flow.
3. In order to log in, call the Quickblox IOS SDK method: QBRequest.logIn(withUserLogin login: String, password: String).
If the Login is successful, then in the successBlock you will get the user and be able to connect to the chat.
If the Login is unsuccessful then you will get an error in the errorBlock and will return it and end the Login flow.
4. To connect to the chat server, call the QBChat.instance.connect(withUserID: UInt, password: String) method, which will return nil in case of a successful connection to the chat or return an error if the connection fails.
The next step is to add the private let authModule = AuthModule() variable to your Login Screen.
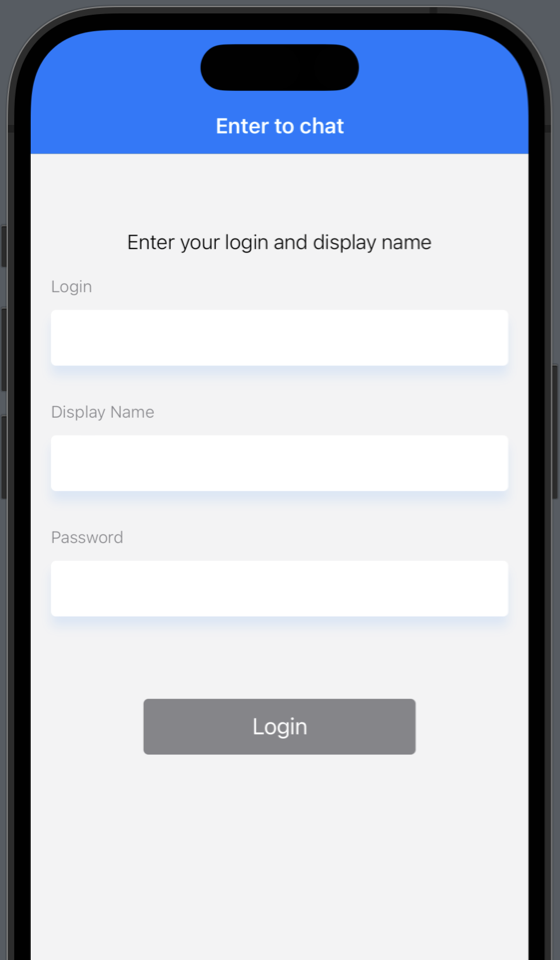
As you may have noticed, the fullName: String parameter has appeared, but we do not have a text field to enter it. Let’s fix this and add another DisplayNameTextField to your Login Screen to get this result:
Make a small refactoring of your TextFields and move the repeating code into a new BaseTextField structure:
import SwiftUI

struct BaseTextField : View {
    @State var isSecure: Bool
    @State var textFieldName: String
    @State var invalidTextHint: String
    @State var regexes: [Regex]
    @State private var isFocused: Bool = false
    @State private var hint: String = ""
    @Binding var text: String {
        didSet {
            guard regexes.isEmpty == false else {
                isValidText = true
                return
            }
            isValidText = text.isValid(regexes: regexes.compactMap { "\($0.rawValue)" })
        }
    }

    @Binding var isValidText: Bool {
        didSet {
            hint = isValidText ? "" : Hint.login.rawValue
        }
    }

    var body: some View {
        return VStack(alignment: .leading, spacing: 11) {
            TextFieldName(name: textFieldName)

            RepresentableTextField(text: $text,
                                   isSecure: $isSecure,
                                   isFocused: $isFocused)
            .accentColor(.blue)
            .onChange(of: text, perform: { newValue in
                self.text = newValue
            })
            .font(.system(size: 17, weight: .thin))
            .foregroundColor(.primary)
            .disableAutocorrection(true)
            .autocapitalization(.none)
            .frame(height: 44)
            .padding(.horizontal, 12)
            .background(Color.white)
            .cornerRadius(4.0)
            .shadow(color: isFocused == true ? .blue.opacity(0.2) : .blue.opacity(0.1),
                    radius: 4, x: 0, y: 8)

            TextFieldHint(hint: hint)
        }
    }
}

struct RepresentableTextField: UIViewRepresentable {

    @Binding var text: String
    @Binding var isSecure: Bool
    @Binding var isFocused: Bool

    func makeUIView(context: UIViewRepresentableContext) -> UITextField {
        let textField = UITextField(frame: .zero)
        textField.isUserInteractionEnabled = true
        textField.delegate = context.coordinator
        return textField
    }

    func makeCoordinator() -> RepresentableTextField.Coordinator {
        return Coordinator(text: $text, isFocused: $isFocused)
    }

    func updateUIView(_ uiView: UITextField, context: Context) {
        uiView.text = text
        uiView.isSecureTextEntry = isSecure
        uiView.autocapitalizationType = .none
        uiView.autocorrectionType = .no
    }

    class Coordinator: NSObject, UITextFieldDelegate {
        @Binding var text: String
        @Binding var isFocused: Bool

        init(text: Binding, isFocused: Binding) {
            _text = text
            _isFocused = isFocused
        }

        func textFieldDidChangeSelection(_ textField: UITextField) {
            text = textField.text ?? ""
        }

        func textFieldDidBeginEditing(_ textField: UITextField) {
            DispatchQueue.main.async {
                self.isFocused = true
            }
        }

        func textFieldDidEndEditing(_ textField: UITextField) {
            DispatchQueue.main.async {
                self.isFocused = false
            }
        }

        func textFieldShouldReturn(_ textField: UITextField) -> Bool {
            textField.resignFirstResponder()
            return false
        }
    }
}
Thanks to this update, you will refactor the Text Fields:
struct LoginTextField : View {

    @Binding var login: String
    @Binding var isValidLogin: Bool

    var body: some View {
        return BaseTextField(isSecure: false,
                             textFieldName: "Login",
                             invalidTextHint: Hint.login.rawValue,
                             regexes: [Regex.login, Regex.email],
                             text: $login,
                             isValidText: $isValidLogin)
    }
}


struct DisplayNameTextField : View {

    @Binding var displayName: String
    @Binding var isValidDisplayName: Bool

    var body: some View {
        return BaseTextField(isSecure: false,
                             textFieldName: "Display Name",
                             invalidTextHint: Hint.displayName.rawValue,
                             regexes: [Regex.displayName],
                             text: $displayName,
                             isValidText: $isValidDisplayName)
    }
}

struct PasswordTextField : View {

    @Binding var password: String
    @Binding var isValidPassword: Bool

    var body: some View {
        return BaseTextField(isSecure: true,
                             textFieldName: "Password",
                             invalidTextHint: Hint.password.rawValue,
                             regexes: [Regex.password],
                             text: $password,
                             isValidText: $isValidPassword)
    }
}
You can also update the Login Button:
struct LoginButton : View {
    @Binding var isValidLogin: Bool
    @Binding var isValidPassword: Bool
    @Binding var isValidDisplayName: Bool

    var onTapped: (() -> Void)

    var body: some View {
        return Button {
            onTapped()
        } label: {
            Text("Login")
                .foregroundColor(.white)
                .font(.system(size: 18))
                .frame(width: 215, height: 44, alignment: .center)
        }
        .disabled(isValid == false)
        .background(isValid ? .blue : .secondary)
        .cornerRadius(4)
        .shadow(color: isValid ? .blue.opacity(0.7) : .clear,
                radius: 14, x: 0, y: 9)
        .padding(.top, 36)
    }

    private var isValid: Bool {
        return isValidLogin && isValidPassword && isValidDisplayName
    }
}
Refactor the Login Screen:
import SwiftUI
import Quickblox

struct LoginConstant {
    static let enterToChat = "Enter to chat"
    static let fullNameDidChange = "Full Name Did Change"
    static let signUp = "Signg up ..."
    static let intoChat = "Login into chat ..."
    static let withCurrentUser = "Login with current user ..."
    static let enterUsername = "Enter your login and display name"
    static let noInternetConnection = "No Internet Connection"
}

enum Hint: String {
    case login = "Use your email or alphanumeric characters in a range from 3 to 50. First character must be a letter."
    case displayName = "Use alphanumeric characters and spaces in a range from 3 to 20. Cannot contain more than one space in a row."
    case password = "Use alphanumeric characters in a range from 8 to 12. First character must be a letter."
}

enum Regex: String {
    case login = "^[a-zA-Z][a-zA-Z0-9]{2,49}$"
    case email = "^[A-Z0-9a-z\\._%+-]+@([A-Za-z0-9-]+\\.)+[A-Za-z]{2,49}$"
    case displayName = "^(?=.{3,20}$)(?!.*([\\s])\\1{2})[\\w\\s]+$"
    case password = "^[a-zA-Z][a-zA-Z0-9]{7,11}$"
}

struct LoginScreen: View {

    @State private var login: String = ""
    @State private var password: String = ""
    @State private var displayName: String = ""

    @State private var isValidLogin: Bool = false
    @State private var isValidPassword: Bool = false
    @State private var isValidDisplayName: Bool = false

    @State private var loginInfo = LoginConstant.enterUsername
    @State private var isLoggedSuccess: Bool = false

    private let authModule = AuthModule()

    init() {
        setupNavigationBarAppearance(titleColor: UIColor.white, barColor: UIColor(.blue))
    }

    var body: some View {
        NavigationView {
            VStack(spacing: 18) {

                InfoText(loginInfo: $loginInfo).padding(.top, 44)

                LoginTextField(login: $login,
                               isValidLogin: $isValidLogin)

                DisplayNameTextField(displayName: $displayName,
                                     isValidDisplayName: $isValidDisplayName)

                PasswordTextField(password: $password,
                                  isValidPassword: $isValidPassword)

                LoginButton(isValidLogin: $isValidLogin,
                            isValidPassword: $isValidPassword,
                            isValidDisplayName: $isValidDisplayName,
                            onTapped: {
                    authModule.enterToChat(fullName: displayName,
                                           login: login,
                                           password: password) { error in
                        if let error = error {
                            self.handleError(error)
                            return
                        }
                        //did Login action
                        self.isLoggedSuccess = true
                    }
                })

                NavigationLink(isActive: $isLoggedSuccess) {
                    DialogsView()
                } label: {}.hidden()

                Spacer()
            }
            .padding()
            .background(.secondary.opacity(0.1))
            .navigationBarTitle(LoginConstant.enterToChat, displayMode: .inline)
        }
    }

    //MARK: - Internal Methods
    private func handleError(_ error: Error) {
        var infoText = error.localizedDescription
        if error._code == QBResponseStatusCode.unAuthorized.rawValue {
            defaultConfiguration()
        } else if error.isNetworkError == true {
            infoText = LoginConstant.noInternetConnection
        }
        loginInfo = infoText
    }
}

struct LoginScreen_Previews: PreviewProvider {
    static var previews: some View {
        LoginScreen()
    }
}

struct InfoText: View {

    @Binding var loginInfo: String

    var body: some View {
        return Text(loginInfo)
            .font(.system(size: 16, weight: .light))
            .foregroundColor(.primary)
    }
}
When the Login Button is clicked, the AuthModule() method enterToChat(fullName: String, login: String, password: String) will be called. Upon successful completion of the Login flow, change the isLoggedSuccess variable to true, which in turn will open the Dialogs Screen:
NavigationLink(isActive: $isLoggedSuccess) {
       DialogsView()
} label: {}.hidden()
Create a Screen dialog:
struct DialogsView: View {
    var body: some View {
        Text("Hello, DialogsView!")
    }
}

struct DialogsView_Previews: PreviewProvider {
    static var previews: some View {
        DialogsView()
    }
}
If the user authorization and the connection to the chat server is successful, you will see the following screen:
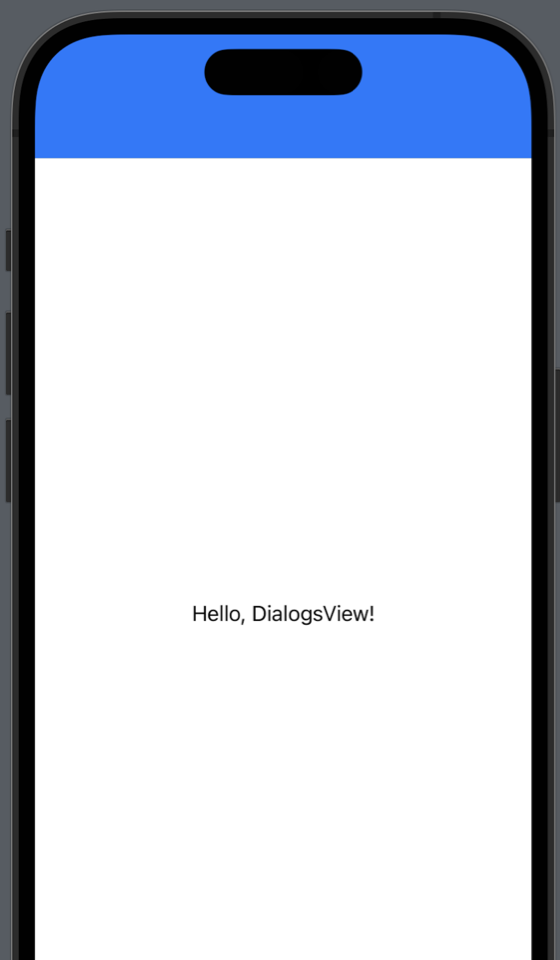
Wonderful!
In this article, you have become acquainted with the basic authorization methods of the Quickblox IOS SDK, refactored the text fields, and completed the user authorization and connection to the chat server.
In the next part of the tutorial, we will make a request for dialogs from the server and work on the UI Dialogs Screen!
Let us know what you think of this tutorial in the comments below.
Tell us about your experience of building chat in the QuickBlox Developer Discord Channel – a community for developers to share ideas: bit.ly/quickblox-dev-community
Have Questions? Need Support?
Join the QuickBlox Developer Discord Community, where you can share ideas, learn about our software, & get support.
Join QuickBlox Discord
 AI Agent — automate conversations and workflows. Now available on Free plan


