quora
  • Recent
Add chat and video calling using QuickBlox chat API and SDK

Build Your Own Messenger With Real-Time Chat & Video APIs

Add instant messaging and online video chat to any Android, iOS, or Web application, with ease and flexibility. In-app chat and calling APIs and SDKs, trusted globally by developers, startups, and enterprises.

phone
QuickBlox Bayshore
QuickBlox NextGen
QuickBlox MORABANC
QuickBlox ZUELLIG PHARMA
QuickBlox Teladoc
QuickBlox OMRON

Launch quickly and convert more prospects with real‑time Chat, Audio, and Video communication

If you own a product, you know exactly how drawn-out and exorbitant it can be to build to build real-time communication features from scratch. Quickblox can help you design, create, and enter the market at a much faster rate with APIs and SDKs that shortcut product and engineering delivery. Convert your ideas into a successful product with us and watch the engagement rate rise, while you build a loyal user base.

Over 30,000 software developers and organizations worldwide are using QuickBlox messaging API.

200+

enterprise instances

22K+

applications

75M+

chats per day

2.5B+

requests per month

Wherever you are in your product journey, we have chat, voice, and video APIs ready to build new features into your app

Why QuickBlox?

Quickblox APIs are equipped to support mobile applications and websites at different stages, be it a fresh product idea, an MVP, early stage startup or a scaling enterprise. Our documentation and developer support are highly efficient to make your dream product a reality.

QuickBlox

Chat API and Feature-Rich SDKs

Our versatile software is designed for multi‑platform use including iOS, Android, and the Web.

QuickBlox

SDKs and Code Samples:

Cross-platform kits and sample apps for easy and quick integration of chat.

QuickBlox

Restful API:

Enable real-time communication via the server.

QuickBlox

UI Kits:

Customize everything as you want with our ready UI Kits.

QuickBlox

Q-Consultation:

White‑label solution for teleconsultation and similar use cases.

QuickBlox

Fully Customizable White Label Solutions

Customizable UI Kits to speed up your design workflow and build a product of your vision as well as a ready white‑label solution for virtual rooms and video calling use cases.

QuickBlox

Cloud & Dedicated Infrastructure

Host your apps wherever you want - opt for a dedicated fully managed server or on‑premises infrastructure. Pick a cloud provider that’s best as per your business goals.

QuickBlox

Cloud:

A dedicated QuickBlox cloud or your own virtual cloud?

QuickBlox

On-Premise:

Deployed and managed on your own physical server.

QuickBlox

Docs:

Integrating QuickBlox across multiple platforms.

QuickBlox

Support:

Quickblox support is a click away.

QuickBlox

Rich Documentation & Constant Support

Get easy step by step guidance to build a powerful chat/messaging/communication app. Easily integrate new features using our documentation and developer support.

Do you need additional security, compliance, and support for the long-term ?

We have a more scalable and flexible solution for you, customized to your unique business/app requirements.

Insanely powerful in-app chat solutions- for every industry

  • Healthcare

    Provide better care for your patients and teams using feature-rich HIPAA‑compliant chat solutions. Integrate powerful telemedicine communication tools into your existing platform.

    QuickBlox
  • Finance & Banking

    Secure communication solutions for the financial and banking industry to support your clients. Easily integrated with your banking APIs with full customization available.

    QuickBlox
  • Marketplaces & E-commerce

    Integrate chat and calling into your e‑commerce marketplace platform to connect with customers using chat, audio, and video calling features.

    QuickBlox
  • Education & Coaching

    Add communication functions to connect teachers with students, coaches with players, and trainers with clients. Appropriate for any remote learning application.

    QuickBlox

Trusted by Developers & Product Owners

Explore Documentation

Familiarize yourself with our chat and calling APIs. Use our platform SDKs and code samples to learn more about the software and integration process.

Start For FREE. Customize Everything. Build Your Dream Online Platform.

Our real-time chat and messaging solutions scale as your business grows, and can be customized to create 100% custom in-app messaging.

QUICKBLOX
QuickBlox post-box

Q-Consultation for every industry

Securely hold virtual meetings and video conferences

Learn More>

Want to learn more about our products and services?

Speak to us now

How To Build A Login Page In SwiftUI: 1. Creating a basic login screen

Vladimir Nybozhinsky
4 Nov 2022
build a basic login screen with SwiftUI

SwiftUI is a relatively new technology that offers an exciting way to build user interfaces for iOS apps on the Apple platform. In the following series of tutorials we will be showing you how to create a Login page in SwiftUI when you build a chat app using QuickBlox iOS SDK.

QuickBlox SwiftUI Tutorial Series:
Getting started with SwiftUI
How to Connect QuickBlox iOS SDK to your SwiftUI Project

Creating a Login Screen in SwiftUI

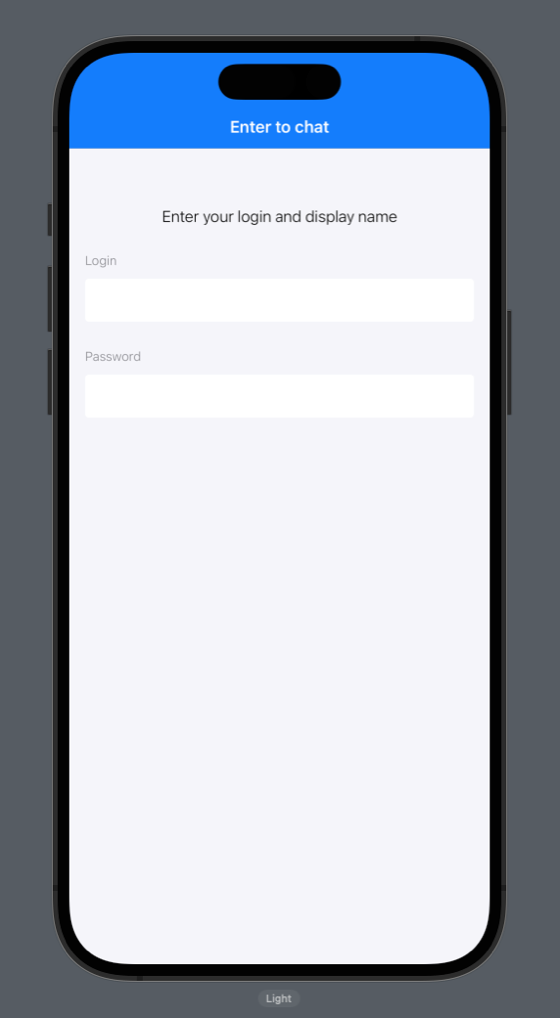
In the following tutorial you will learn how create text fields and buttons as part of your iOS app UI using SwiftUI. We will show you how to build a login screen user interface similar to the one shown in the image below:

login screen

This screen consists of the following 4 elements:

  1. Text “Enter your login and password”
  2. TextField for login input
  3. SecureField to enter Password
  4. Button “Login”

We can also see that the NavigationView is used with the title “Enter to chat.”

Are you ready to get started?

1. Create a project

First you need to login to your QuickBlox account and connect to the QuickBlox iOS SDK so that you can request data from the server.

You can learn how to create a project and connect the QuickBlox SDK in an earlier blog, How to create an application in your QuickBlox account.

We recommend downloading the current project from this GitHub repository, or you can use own resources for the user interface.

If you choose not to download from the repository and instead build from scratch, we recommend that you still name it QuickbloxSwiftUIChat, as we will be referring to this specific file name in the instructions below.

2. Creation of the user interface

The Login screen is the gateway to most apps. For the app you’re creating, users must enter their Login and Password on this vital first screen in order to access the application and log into the QuickBlox system.
Here’s how to start building do this:

First, create a new file and name it “Login Screen.”

  • Right-click on the QuickbloxSwiftUIChat project folder
  • Select “New File…” in the drop-down window
  • Then select “SwiftUI View” in the window that appears
  • Give the name “LoginScreen”
  • Click “Create”

creating a user interface

Then, tell your application to open the “LoginScreen” when logging in.

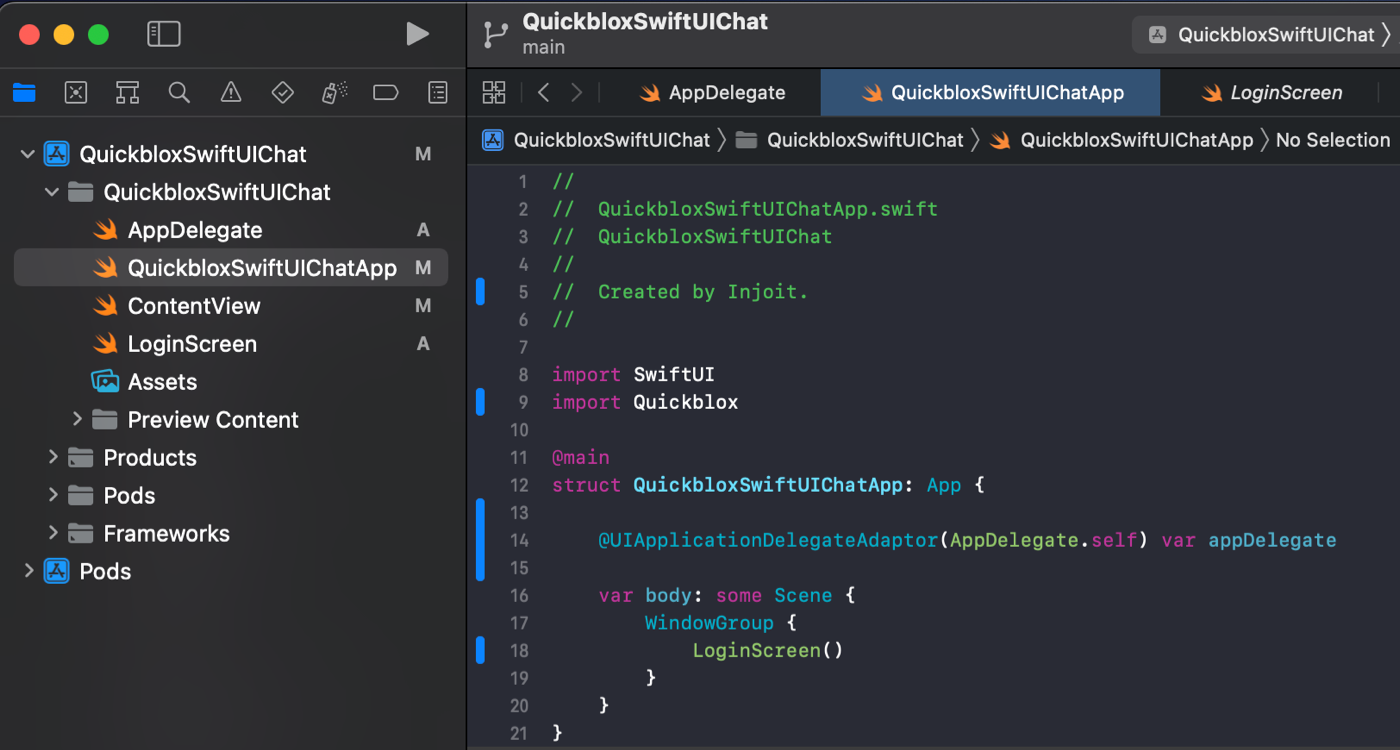
  • Open the QuickbloxSwiftUIChatApp file
  • Replace ContentView() with LoginScreen(). We no longer need the ContentView file and can be removed from the project.
  • Next, go to the LoginScreen file and in the body add your info text: Text(“Enter your login and display name”) with some settings and wrap it in a VStack. To do this, create a new InfoText structure:

    struct InfoText: View {
        var body: some View {
            Text("Enter your login and password")
                .font(.system(size: 16, weight: .light))
                .foregroundColor(.primary)
        }
    }


    And paste it into the LoginScreen:

    struct LoginScreen: View {
        var body: some View {
            VStack(spacing: 28) {
                InfoText().padding(.top, 44)
            }
            .padding()
        }
    }
    

    Before you go any further, you need to wrap your VStack in a NavigationView and customize its appearance.

    Create a new View+Extension.swift file and make an extension for the View structure to customize the NavigationBar:

    import SwiftUI
     
    extension View {
        func setupNavigationBarAppearance(titleColor: UIColor, barColor: UIColor) {
            let appearance = UINavigationBarAppearance()
            appearance.configureWithOpaqueBackground()
            appearance.backgroundColor = barColor
            appearance.titleTextAttributes = [.foregroundColor: titleColor]
            UINavigationBar.appearance().standardAppearance = appearance
            UINavigationBar.appearance().compactAppearance = appearance
            UINavigationBar.appearance().scrollEdgeAppearance = appearance
        }
    }
    

    Place this file in the Utils folder.

    Then you will set up the NavigationView.

    import SwiftUI
     
    struct LoginScreen: View {
     
        init() {
            setupNavigationBarAppearance(titleColor: UIColor.white, barColor: UIColor(.blue))
        }
     
        var body: some View {
            NavigationView {
                VStack(spacing: 28) {
                    InfoText().padding(.top, 44)
     
                    Spacer()
                }
                .navigationBarTitle("Enter to chat", displayMode: .inline)
            }
        }
    }
    

    Further, according to the design, you should have two data entry fields so that the user can enter their login and password. To do this, you will create two variables with the @State modifier in order to keep track of the entered data:

    @State private var login: String = ""
    @State private var password: String = “"
    

    Use a TextField to enter the Login and a SecureField to enter the Password. Now add them to LoginScreen with settings to match the design:

    struct LoginScreen: View {
        
        @State private var login: String = ""
        @State private var password: String = ""
        
        init() {
            setupNavigationBarAppearance(titleColor: UIColor.white, barColor: UIColor(.blue))
        }
        
        var body: some View {
            NavigationView {
                VStack(spacing: 28) {
                    InfoText().padding(.top, 44)
                    
                    VStack(alignment: .leading, spacing: 11) {
                        Text("Login")
                            .font(.system(size: 13, weight: .light))
                            .foregroundColor(.secondary)
                            .frame(height: 15, alignment: .leading)
                        
                        TextField("", text: $login)
                            .font(.system(size: 17, weight: .thin))
                            .foregroundColor(.primary)
                            .frame(height: 44)
                            .padding(.horizontal, 12)
                            .background(Color.white)
                            .cornerRadius(4.0)
                    }
                    
                    VStack(alignment: .leading, spacing: 11) {
                        Text("Password")
                            .font(.system(size: 13, weight: .light))
                            .foregroundColor(.secondary)
                            .frame(height: 15, alignment: .leading)
                        
                        SecureField("", text: $password)
                            .font(.system(size: 17, weight: .thin))
                            .foregroundColor(.primary)
                            .frame(height: 44)
                            .padding(.horizontal, 12)
                            .background(Color.white)
                            .cornerRadius(4.0)
                    }
                    
                    Spacer()
                }
                .padding()
                .background(.secondary.opacity(0.1))
                .navigationBarTitle("Enter to chat", displayMode: .inline)
            }
        }
    }


    This is how your screen should currently look:

    creating a user screen

    Move the repetitive Text(“Login”) and Text(“Password”) code into a new TextFieldName structure:

    struct TextFieldName: View {
        let name: String
        var body: some View {
            Text(name)
                .font(.system(size: 13, weight: .light))
                .foregroundColor(.secondary)
                .frame(height: 15, alignment: .leading)
        }
    }
     
     
    Now your code looks like this:
    
    struct LoginScreen: View {
        
        @State private var login: String = ""
        @State private var password: String = ""
        
        init() {
            setupNavigationBarAppearance(titleColor: UIColor.white, barColor: UIColor(.blue))
        }
        
        var body: some View {
            NavigationView {
                VStack(spacing: 28) {
                    InfoText().padding(.top, 44)
                    
                    VStack(alignment: .leading, spacing: 11) {
                        TextFieldName(name: "Login")
                        
                        TextField("", text: $login)
                            .font(.system(size: 17, weight: .thin))
                            .foregroundColor(.primary)
                            .frame(height: 44)
                            .padding(.horizontal, 12)
                            .background(Color.white)
                            .cornerRadius(4.0)
                    }
                    
                    VStack(alignment: .leading, spacing: 11) {
                        TextFieldName(name: "Password")
                        
                        SecureField("", text: $password)
                            .font(.system(size: 17, weight: .thin))
                            .foregroundColor(.primary)
                            .frame(height: 44)
                            .padding(.horizontal, 12)
                            .background(Color.white)
                            .cornerRadius(4.0)
                    }
                    
                    Spacer()
                }
                .padding()
                .background(.secondary.opacity(0.1))
                .navigationBarTitle("Enter to chat", displayMode: .inline)
            }
        }
    }


    Now you just need to add the “Login” button:

    struct LoginScreen: View {
        
        @State private var login: String = ""
        @State private var password: String = ""
        
        init() {
            setupNavigationBarAppearance(titleColor: UIColor.white, barColor: UIColor(.blue))
        }
        
        var body: some View {
            NavigationView {
                VStack(spacing: 28) {
                    InfoText().padding(.top, 44)
                    
                    VStack(alignment: .leading, spacing: 11) {
                        TextFieldName(name: "Login")
                        
                        TextField("", text: $login)
                            .font(.system(size: 17, weight: .thin))
                            .foregroundColor(.primary)
                            .frame(height: 44)
                            .padding(.horizontal, 12)
                            .background(Color.white)
                            .cornerRadius(4.0)
                    }
                    
                    VStack(alignment: .leading, spacing: 11) {
                        TextFieldName(name: "Password")
                        
                        SecureField("", text: $password)
                            .font(.system(size: 17, weight: .thin))
                            .foregroundColor(.primary)
                            .frame(height: 44)
                            .padding(.horizontal, 12)
                            .background(Color.white)
                            .cornerRadius(4.0)
                    }
                    
                    Button {
                        debugPrint("Login Button Tapped!")
                    } label: {
                        Text("Login")
                            .foregroundColor(.white)
                            .font(.system(size: 18))
                            .frame(width: 215, height: 44, alignment: .center)
                    }
                    .background(.secondary)
                    .cornerRadius(4)
                    .padding(.top, 36)
                    
                    Spacer()
                }
                .padding()
                .background(.secondary.opacity(0.1))
                .navigationBarTitle("Enter to chat", displayMode: .inline)
            }
        }
    }
    

    This is how your screen should now look:

    login screen

    Great progress!

    You have now created a basic login screen. In the next part, we will show you how to validate entered data, animate the UI, and continue to improve your code.

Leave a Comment

Your email address will not be published. Required fields are marked *

Read More

Ready to get started?

QUICKBLOX
QuickBlox post-box