With QuickBlox it’s easy to add iOS app features with AI. Whether you’re developing a chat app from scratch or choose to use our convenient iOS UI Kit, you can now utilize the QuickBlox iOS AI library to seamlessly integrate with OpenAI GPT to add exciting functionality.
We now offer AI Answer Assist. This feature allows app users to offer swift and accurate responses to user queries, by utilizing an OpenAI GPT model to analyze the context and provide relevant and concise answers in real-time. AI Answer Assist leads the way for iOS app user experience enhancement.
In the following tutorial we outline two approaches to implementing iOS in-app AI assistance:
I. Install our iOS AI library – QBAIAnswerAssistant – within your existing iOS project
II. Utilize our iOS UI Kit which already includes AI Answer Assist
II. QBAIAnswerAssistant
How to Install
QBAIAnswerAssistant can be installed using Swift Package Manager. To include it in your Xcode project, follow these steps:
- In Xcode, open your project, and navigate to File > Swift Packages > Add Package Dependency.
- Enter the repository https://github.com/QuickBlox/ios-ai-answer-assistant and click “Next”.
- Choose the appropriate version rule and click “Next”.
- Finally, click Finish to add the package to your project.
How to Use
To use QBAIAnswerAssistant in your project, follow these steps:
1. Import the QBAIAnswerAssistant module:
import QBAIAnswerAssistant
2. Create an array of Message objects representing the chat history:
let message1 = OwnerMessage("Hi there, how can I help you today?")
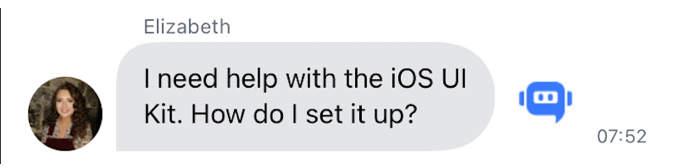
let message2 = OpponentMessage("I need help with the iOS UI Kit. How do I set it up? ")
let messages = [message1, message2]
3. Call the openAIAnswer method to generate an answer using an API key:
do {
    let apiKey = "YOUR_OPENAI_API_KEY"
    let answer = try await
QBAIAnswerAssistant.openAIAnswer(to: messages, secret: apiKey)
    print("Generated Answer: \(answer)")
} catch {
    print("Error: \(error)")
}
Alternatively, you can use a QuickBlox user token and a proxy URL for more secure communication:
do {
    let qbToken = "YOUR_QUICKBLOX_USER_TOKEN"
    let proxyURL = "https://your-proxy-server-url"
    let answer = try await
QBAIAnswerAssistant.openAIAnswer(to: messages, qbToken: qbToken, proxy: proxyURL)
    print("Generated Answer: \(answer)")
} catch {
    print("Error: \(error)")
}
OpenAI
To use the OpenAI API and generate answers, you need to obtain an API key from OpenAI. Follow these steps to get your API key:
- Go to the OpenAI website and sign in to your account or create a new one.
- Navigate to the API section and sign up for access to the API.
- Once approved, you will receive your API key, which you can use to make requests to the OpenAI API.
Proxy Server
Using a proxy server like the QuickBlox AI Assistant Proxy Server offers significant benefits in terms of security and functionality.
Enhanced Security:
- When making direct requests to the OpenAI API from the client-side, sensitive information like API keys may be exposed. By using a proxy server, the API keys are securely stored on the server-side, reducing the risk of unauthorized access or potential breaches.
- The proxy server can implement access control mechanisms, ensuring that only authenticated and authorized users with valid QuickBlox user tokens can access the OpenAI API. This adds an extra layer of security to the communication.
Protection of API Keys:
- Exposing API keys on the client-side could lead to misuse, abuse, or accidental exposure. A proxy server hides these keys from the client, mitigating the risk of API key exposure.
- Even if an attacker gains access to the client-side code, they cannot directly obtain the API keys, as they are kept confidential on the server.
Rate Limiting and Throttling:
- The proxy server can enforce rate limiting and throttling to control the number of requests made to the OpenAI API. This helps in complying with API usage policies and prevents excessive usage that might lead to temporary or permanent suspension of API access.
Request Logging and Monitoring:
- By using a proxy server, requests to the OpenAI API can be logged and monitored for auditing and debugging purposes. This provides insights into API usage patterns and helps detect any suspicious activities.
Flexibility and Customization:
- The proxy server acts as an intermediary, allowing developers to introduce custom functionalities, such as response caching, request modification, or adding custom headers. These customizations can be implemented without affecting the client-side code.
SSL/TLS Encryption:
- The proxy server can enforce SSL/TLS encryption for data transmission between the client and the server. This ensures that data remains encrypted and secure during communication.
II. UI Kit Assist Answer feature
We have already integrated the AI Answer Assist feature within our iOS UI Kit. This feature allows you to generate answers in a chat, based on the chat history using the QBAIAnswerAssistant Swift package. This feature leverages the OpenAI API key or proxy server to generate responses more securely and efficiently.
How to use
To use the AI Assist Answer feature in your QuickBlox UI Kit project, follow these steps:
1. Enable the AI Assist Answer feature:
QuickBloxUIKit.feature.ai.assistAnswer.enable = true
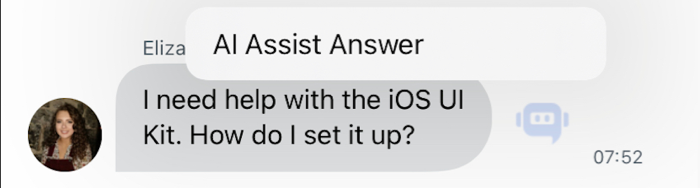
If enabled, a button will appear next to each incoming message in the chat interface.
When the button is clicked, the Assist Answer feature will be launched, and a response will be generated, based on the chat history.
2. Set up the AI settings by providing either the OpenAI API key:
QuickBloxUIKit.feature.ai.answerAssist.apiKey = “YOUR_OPENAI_API_KEY”
Or set up with a proxy server:
QuickBloxUIKit.feature.ai.answerAssist.serverPath = “https://your-proxy-server-url”
We recommend using a proxy server like the QuickBlox AI Assistant Proxy Server, which offers significant benefits as outlined above.
A developer using the AI Answer Assist library has the ability to Default AIAnswerAssistSettings.
public class AIAnswerAssistSettings {
    /// Determines if assist answer functionality is enabled.
    public var enable: Bool = true

    /// The OpenAI API key for direct API requests (if not using a proxy server).
    public var apiKey: String = ""

    /// The URL path of the proxy server for more secure communication (if not using the API key directly).
    /// [QuickBlox AI Assistant Proxy Server](https://github.com/QuickBlox/qb-ai-assistant-proxy-server).
    public var serverPath: String = ""

    /// Represents the available API versions for OpenAI.
    public var apiVersion: QBAIAnswerAssistant.APIVersion = .v1

    /// Optional organization information for OpenAI requests.
    public var organization: String? = nil

    /// Represents the available GPT models for OpenAI.
    public var model: QBAIAnswerAssistant.Model = .gpt3_5_turbo

    /// The temperature setting for generating responses (higher values make output more random).
    public var temperature: Float = 0.5

    /// The maximum number of tokens to generate in the request.
    public var maxRequestTokens: Int = 3000

    /// The maximum number of tokens to generate in the response.
    public var maxResponseTokens: Int? = nil
}
A developer using the AI Answer Assist library has the ability to set up custom settings.
Below is an example of creating custom tones and installing them in QuickBlox iOS UI Kit from the custom application.
import QBAIAnswerAssistant

// Setup custom settings for QBAIAnswerAssistant.
QuickBloxUIKit.feature.ai.answerAssist.organization = "CustomDev"
QuickBloxUIKit.feature.ai.answerAssist.model = .gpt4
QuickBloxUIKit.feature.ai.answerAssist.temperature = 0.8
QuickBloxUIKit.feature.ai.answerAssist.maxRequestTokens = 3500
Additional examples of setting custom settings for the appearance of user interface elements from a user application can be found in our UIKitSample.
Easy Integration
Implementing the “AI Answer Assist” feature into your iOS chat app has never been easier. By following the straightforward steps outlined above you can seamlessly unlock the power of AI-driven interactions and provide your users with instantaneous, relevant, and context-aware responses.
QuickBlox’s commitment to crafting user-friendly tools and easy-to-implement software ensures that businesses across industries can harness the potential of AI without the complexity typically associated with such integrations.
Resources
QBAIPROXY Server – GitHub – QuickBlox/qb-ai-assistant-proxy-server
QBAIAnswerAssistant – GitHub – QuickBlox/ios-ai-answer-assistant
Documentation – AI Features | iOS UIKit | QuickBlox
Have Questions? Need Support?
Join the QuickBlox Developer Discord Community, where you can share ideas, learn about our software, & get support.
Join QuickBlox Discord
 AI Agent — automate conversations and workflows. Now available on Free plan