==

Q-Consultation for every industry

Securely hold virtual meetings and video conferences

Learn More>

Want to learn more about our products and services?

Speak to us now

Getting Started with the QuickBlox Android UI Kit

Vitaliy Dovbnya
15 Jun 2023
Android UI Kit

Real-time communication plays a vital role in enhancing user engagement and building dynamic mobile applications. If you’re an Android developer looking to incorporate powerful messaging features into your app, the QuickBlox Android UI Kit is here to simplify the process. With its intuitive interface and extensive functionality, the UI Kit empowers developers to effortlessly integrate real-time messaging into their Android applications.

Whether you’re building a chat application, a collaborative platform, or a social networking app, the QuickBlox Chat UI Kits offers a range of ready-to-use components and features that significantly expedite the development process. In this guide, we’ll walk you through the step-by-step process of setting up and adding the QuickBlox Android UI kit to your own project, so that you can enhance your Android apps with real-time communication capabilities.

What is the QuickBlox Android UI Kit?

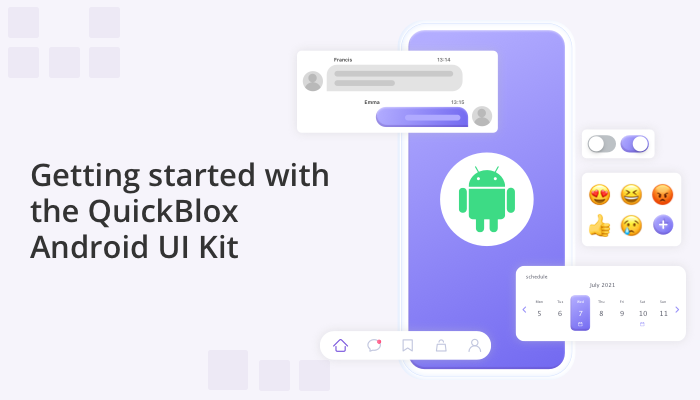
The QuickBlox Android UI kit provides a collection of pre-designed user interface (UI) elements, components, and assets specifically created for Android app development.

By using these ready-to-use UI resources, Android developers can save valuable development time and build attractive Android applications with consistent visual styles and interactions.

The QuickBlox UI Kit for Android includes the following functionality:

  • List of dialogs
  • Create dialog(Private or Group)
  • Dialog screen
  • Send text, image, video, audio, file messages
  • Dialog info screen
  • List, invite, remove members
  • Video calling features to be added shortly.

Learn more about: Create Exceptional Chat Experiences with QuickBlox’s Chat UI Kits

Step 1: Getting started

For this project you will need a QuickBlox account. Register here if you don’t already have one.

Read our earlier blog, How to Create an App and Use the QuickBlox Admin Panel to learn how to set up and access your App credentials, which you will need to know in Step 3 below.

Step 2: Install QuickBlox UI Kit

You can install the Quickblox Android UI Kit in your project from two main sources:

  1. Repository (GitHub)
  2. Local source

To install the QuickBlox UIKit from the repository:

  1. Import the QuickBlox Android UIKit and QuickBlox Android SDK dependencies via build.gradle file.
  2. Include a reference to the SDK repository in your project-level build.gradle file at the root directory or to settings.gradle file.
  3. Specify the URL of the QuickBlox repository, where the files are stored. Gradle can follow the URL to find the SDK artifacts.
  4. repositories {
        maven {
            url "https://github.com/QuickBlox/android-ui-kit-releases/raw/master/"
        }
    
  5. Then you need to implement the QuickBlox UIKit and QuickBlox SDK to the dependencies in your module-level(App) build.gradle file.
dependencies {
    implementation "com.quickblox:android-ui-kit:0.1.1"

    implementation 'com.quickblox:quickblox-android-sdk-messages:4.1.1'
    implementation 'com.quickblox:quickblox-android-sdk-chat:4.1.1'
    implementation 'com.quickblox:quickblox-android-sdk-content:4.1.1'
}

Installing the QuickBlox UIKit from local source

  1. Import the QuickBlox Android SDK dependencies via build.gradle file.
  2. Include a reference to the SDK repository in your project-level build.gradle file at the root directory or to settings.gradle file.
  3. Specify the URL of the QuickBlox repository where the files are stored. Gradle can follow the URL to find the SDK artifacts.
  4. repositories {
        google()
        mavenCentral()
        maven {
            url "https://github.com/QuickBlox/quickblox-android-sdk-releases/raw/master/"
        }
    }
    
  5. Then you need to download the QuickBlox UI Kit from the GitHub repository to include the UI Kit locally in your project.
  6. Specify the path of the UIKit project in settings.gradle file.
  7. include ':ui-kit'
    project(':ui-kit').projectDir = new File('YourPath/android-ui-kit/ui-kit')
    
  8. Finally, you need to add implementation of UIKit project to dependencies in your module-level(App) build.gradle file.
dependencies {
    implementation project(':ui-kit')
}

Step 3: Initialize the QuickBlox SDK

Next you need to initialize or “init” or the SDK, which means to set up the necessary configuration and prepare the SDK to be used in your development environment or application.

To init QuickBlox SDK you need to pass the Application ID, Authorization Key, Authorization Secret, and Account Key to the init() method.

Read our tutorial, How to Create an App and Use the QuickBlox Admin Panel for more details on how to get credentials.

private const val APPLICATION_ID = "67895"
private const val AUTH_KEY = "lkjdueksu7392kj"
private const val AUTH_SECRET = "BTFsj7Rtt27DAmT"
private const val ACCOUNT_KEY = "9yvTe17TmjNPqDoYtfqp"

QBSDK.init(applicationContext, APPLICATION_ID, AUTH_KEY, AUTH_SECRET, ACCOUNT_KEY)

Step 4: Authenticate users & implement chat functionality

Before sending your first message you first need to authenticate users in the QuickBlox system. You can read more about different authentication methods in our official documentation. In our example below, we show you how to authenticate users with a login and password.

After successfully signing-in, you need to initialize the QuickBlox UIKit by the invoke init(applicationContext) method of the QuickBloxUiKit and start the Dialogs screen by the invoke show() method of the DialogActivity.

val user = QBUser()
user.login = "userlogin"
user.password = "userpassword"

QBUsers.signIn(user).performAsync(object : QBEntityCallback {
    override fun onSuccess(user: QBUser?, bundle: Bundle?) {
        // init Quickblox UIKit  
        QuickBloxUiKit.init(applicationContext)
        // show Dialogs screen
        DialogsActivity.show(context)  
    }

    override fun onError(exception: QBResponseException?) {
        // handle exception
    }
})

The dialog screen is the entry point to UI Kit. Once this has been launched, you can use the default chat functionality.

For a deeper dive into the QuickBlox Android UI Kit’s potential and to gain insights into customizing the interface of your application, we highly recommend exploring our Android UIKit Sample. This sample not only demonstrates the steps outlined earlier but also offers additional examples. It serves as an invaluable resource to witness the UI Kit in action and spark inspiration for your own app development journey.

Next Steps

We’ve now completed the initial steps for getting started with the Android UI Kit. We’ve shown you how to set up the development environment, configure the QuickBlox SDK, integrate the UI Kit into an application, and run the default chat functionality.

The next tutorial will show how to use and change the components in the UI Kit so that you can customize your chat app and create the user experience that you want.

The QuickBlox Android UI Kit provides developers with a powerful and user-friendly solution that saves significant development time and effort while delivering a seamless and interactive user experience. By following the steps outlined in this tutorial and the next, you can harness the power of the QuickBlox Android UI Kit and unlock the full potential of real-time communication in your Android applications.

Have Questions? Need Support?

Join the QuickBlox Developer Discord Community, where you can share ideas, learn about our software, & get support.

Join QuickBlox Discord

Leave a Comment

Your email address will not be published. Required fields are marked *

Read More

Ready to get started?

QUICKBLOX
QuickBlox post-box