Summary: Learn how to enhance your QuickBlox React app with seamless social authentication using Facebook. This tutorial highlights the benefits of integrating the React UIKit for streamlined development and leveraging social login to simplify user registration and login processes, improving user experience and security. Follow step-by-step instructions to set up your Facebook Developer account, create a React application, and implement Facebook authentication effortlessly.
Table of Contents
Introduction
In the world of web development, securing user data is vital. One of the key elements of web application security is user authentication. The use of social authentication providers such as Facebook, Google, Twitter, and others is becoming increasingly popular among developers. This approach not only simplifies the registration and login process for users but also improves application security by using proven authentication mechanisms from major companies.
In this article, we will look at the process of adding authentication using social authentication providers to web applications in React. We will discuss the main advantages of this approach and get acquainted with a tool that greatly simplifies this process – Quickblox React UIKit.
Using a Social Network Provider for Authentication
Authentication through social providers, such as Facebook, is a mechanism that allows users to log into web applications using their accounts on these platforms. The login process via Facebook typically involves the following steps:
- Initiating authentication request: The user clicks on the “Log in with Facebook” button or similar, initiating the authentication process.
- Redirecting to Facebook page: The user is redirected to the Facebook login page, where they are prompted to log into their account.
- User authentication: The user enters their credentials (phone number or email and password) and clicks “Log in”.
- Permission confirmation: After successful authentication, the user must grant your web application access to certain data in their Facebook profile. This could include data such as username, email address, profile picture, and others.
- Returning to your application: After granting access, the user returns to your web application, which receives an access token from Facebook.
- Access token verification and processing: Your web application verifies the access token from Facebook to ensure its authenticity, and then uses this token to authenticate the user in its system. If the user already exists, they log into their account; if not, a new account is created.
Authentication through Facebook simplifies the login process for users of your web application, allowing them to use their existing Facebook account without the need to create a new one. This approach can also enhance application security by providing access to verified authentication mechanisms from a major platform.
Using QuickBlox React UIKit
QuickBlox UIKit for React is a library of user interface (UI) components with implemented business logic, specifically designed to simplify the development process of chat web applications in React. This library provides developers with a wide range of ready-made components that can be easily integrated into their projects, significantly speeding up the process of creating the user interface and improving its quality.
Key features and components of QuickBlox UIKit for React:
- Chat and messaging
- File management
- Notifications and alerts
Using the UI components provided by QuickBlox UIKit for React has several advantages for developers:
- Efficiency and speed of development: Ready-made components allow for quickly creating a user interface without the need for development from scratch.
- Consistency and coherence: Using standard components ensures a consistent look and behavior of the application, enhancing the user experience.
- Scalability and support: QuickBlox UIKit for React provides scalability for projects and support for various devices and browsers, making it an ideal choice for commercial web applications.
Ready to get started?
Now we have explained the benefits of social authentication and the benefits of the React UIKit, let’s take you through the steps for adding authentication to your application.
Step 1: Installing QuickBlox UIKit for a React Project
To add authentication via Facebook provider to our web application, we will utilize a demo application already using QuickBlox UIKit for React. This will allow us to quickly integrate authentication functionality into an existing project.
First, we will download the sample code from the QuickBlox UIKit for React repository, available at the following link: QuickBlox React UIKit Demo App.
After downloading the sample code, we will install all the necessary libraries using the command in the terminal:
npm install
This will allow you to download all dependencies, including QuickBlox UIKit for React and other libraries required for the application to function.
For this example to work successfully, you need to add credentials to the file src\QBconfig.ts. In this file, you should specify access parameters for QuickBlox, such as appId, accountKey, authKey, authSecret, and sessionToken.
credentials: {
        appId: -1,
        accountKey: '',
        authKey: '',
        authSecret: '',
        sessionToken: '',
    },
To obtain these parameters, you need to register an account on the Quickblox portal at the following link: QuickBlox Registration. Then, within your account, create an application and obtain the credentials. For more detailed information on how to do this, you can refer to our article at the following link: How to create a React application with QuickBlox UIKit.
After making changes to the src\QBconfig.ts file, you can run your application using the command in the terminal:
npm run start
Step 2: Obtaining API Keys from Facebook
Before we can add authentication via the Facebook provider to our web application, we need to obtain API keys from Facebook. These keys will allow our application to interact with the Facebook API for user authentication and retrieving necessary information about them.
To obtain API keys from Facebook, follow these steps:
- Register your application on Facebook for Developers: Go to the Facebook for Developers website and register a new application if you don’t have one yet. If you already have an application, you can skip this step.
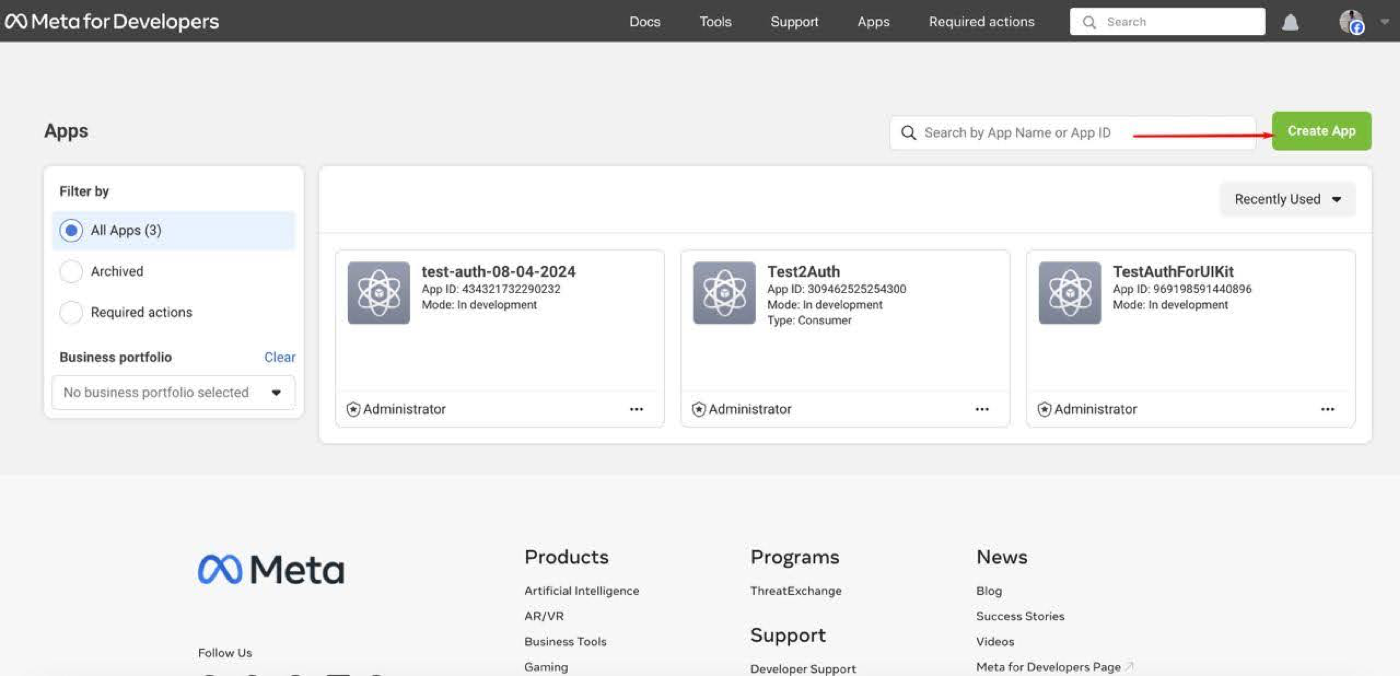
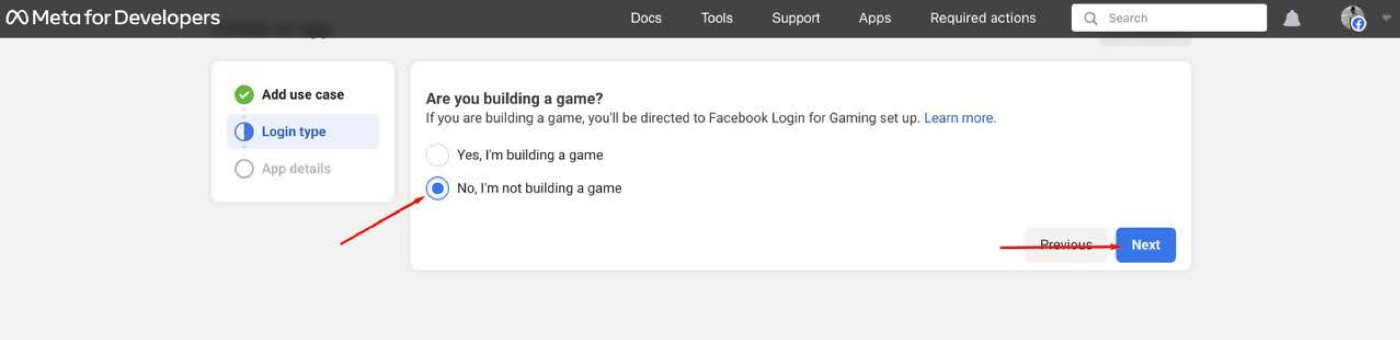
- Create a new application: After logging into your Facebook developer account, navigate to the “My Apps” page and click the “Create App” button.
Specify the application type as “Authenticate and request data from users with Facebook Login”.
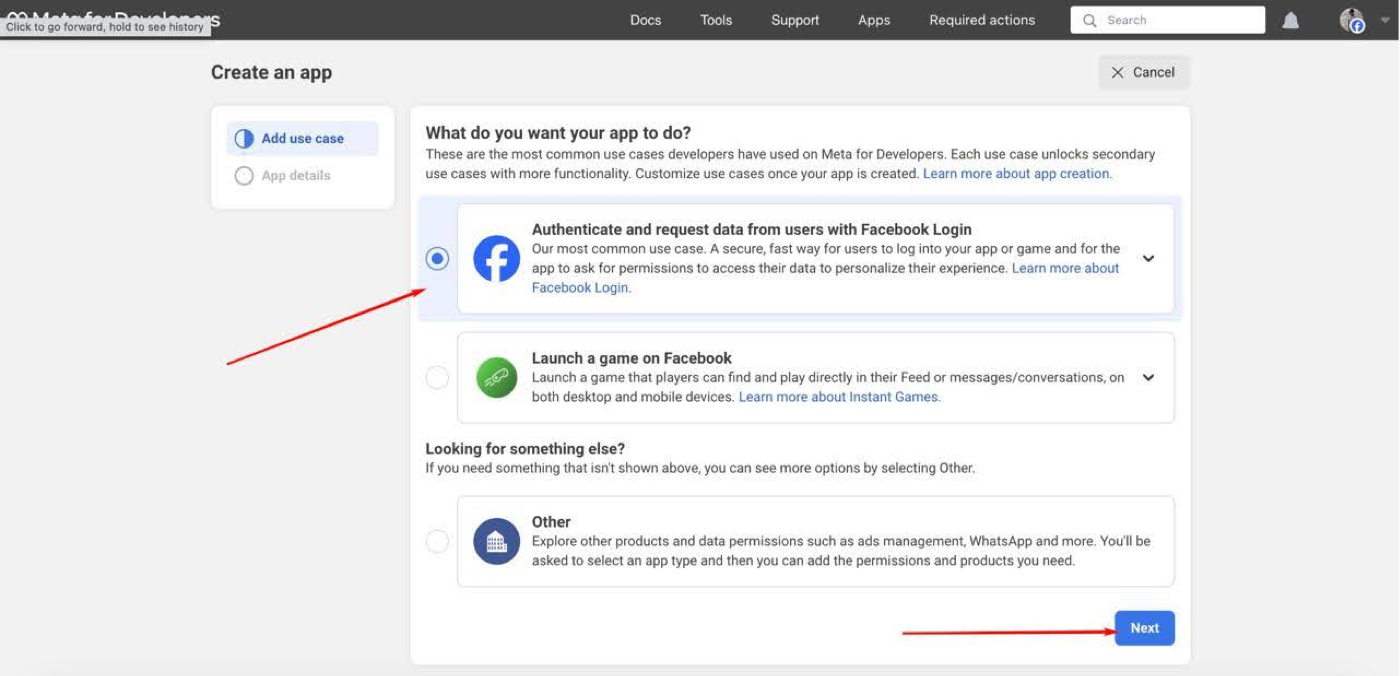
Name your application and select the platform “Web”.
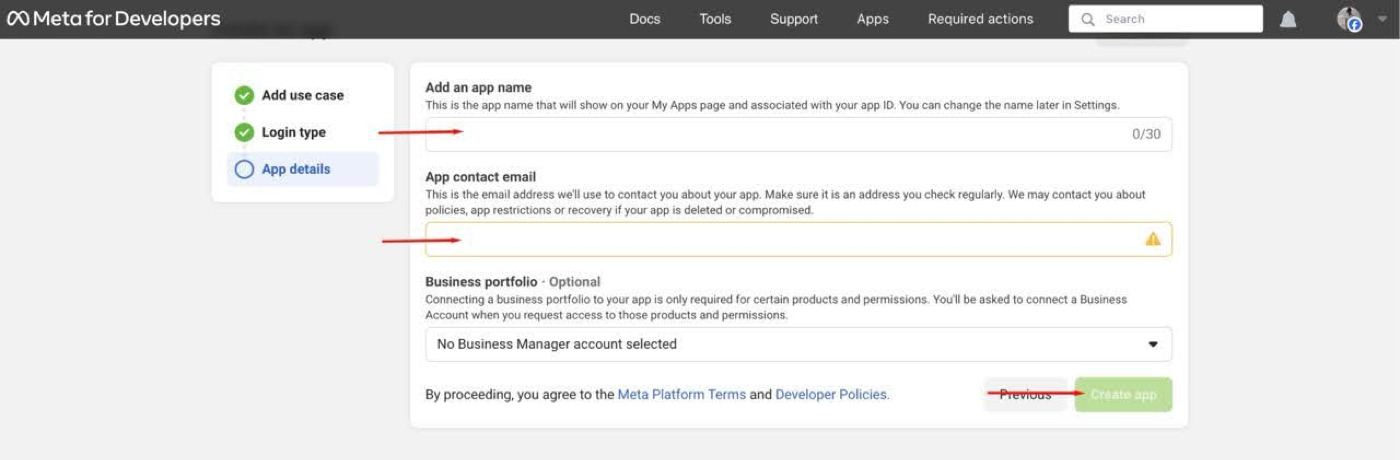
Configure the application: After creating the application, go to the settings page.
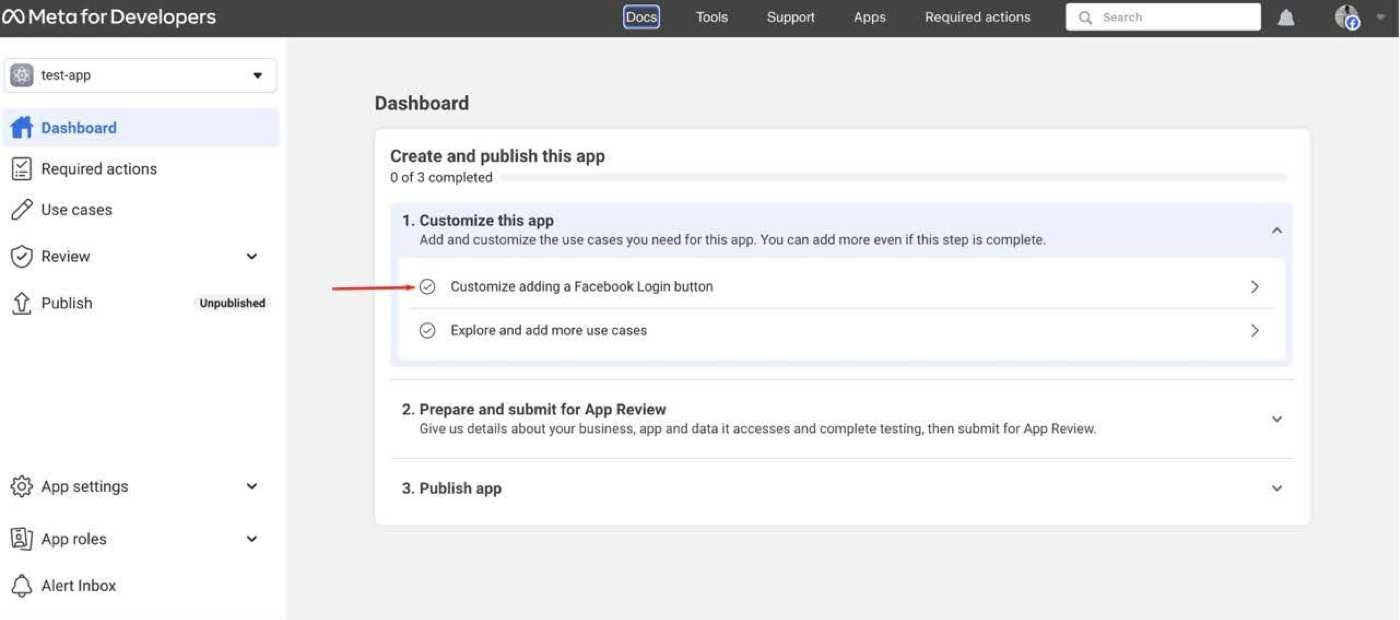
Here you will need to specify the domain of your web application, to which Facebook will redirect users after successful authentication. Also, you will need to specify the redirect URI for login, which will be used during authentication through Facebook.
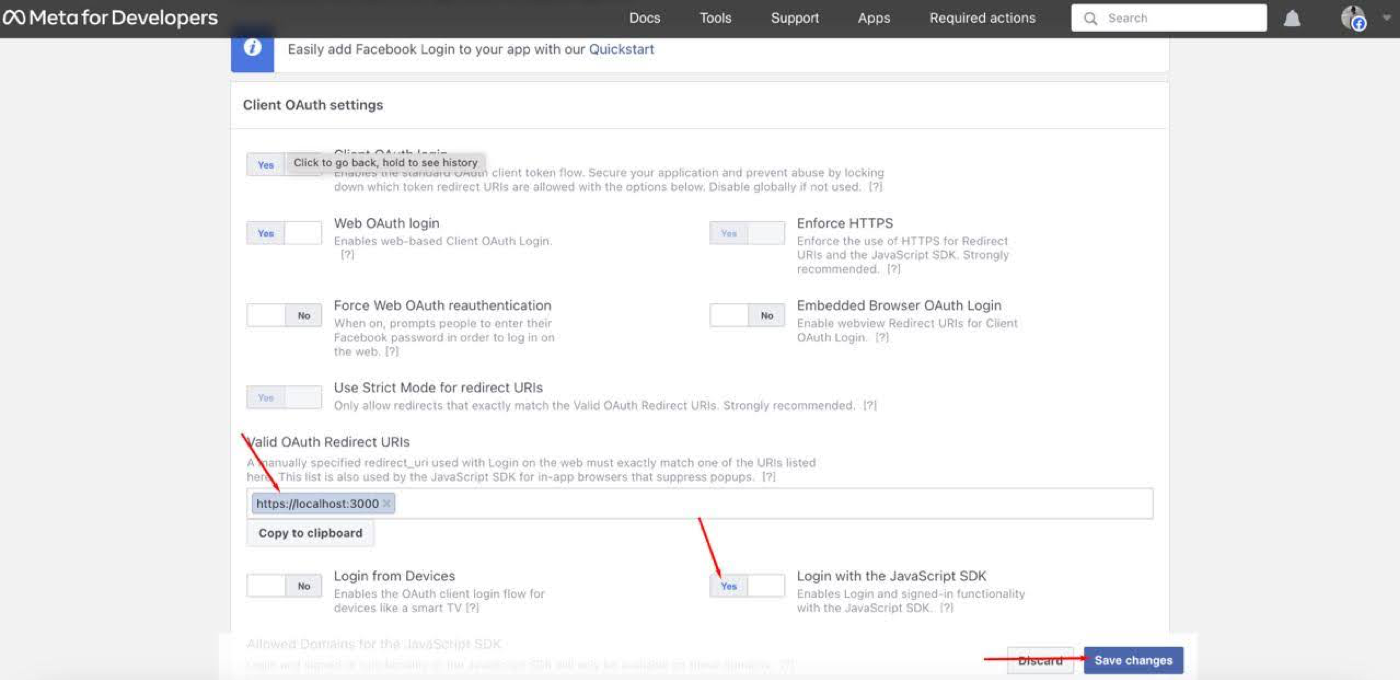
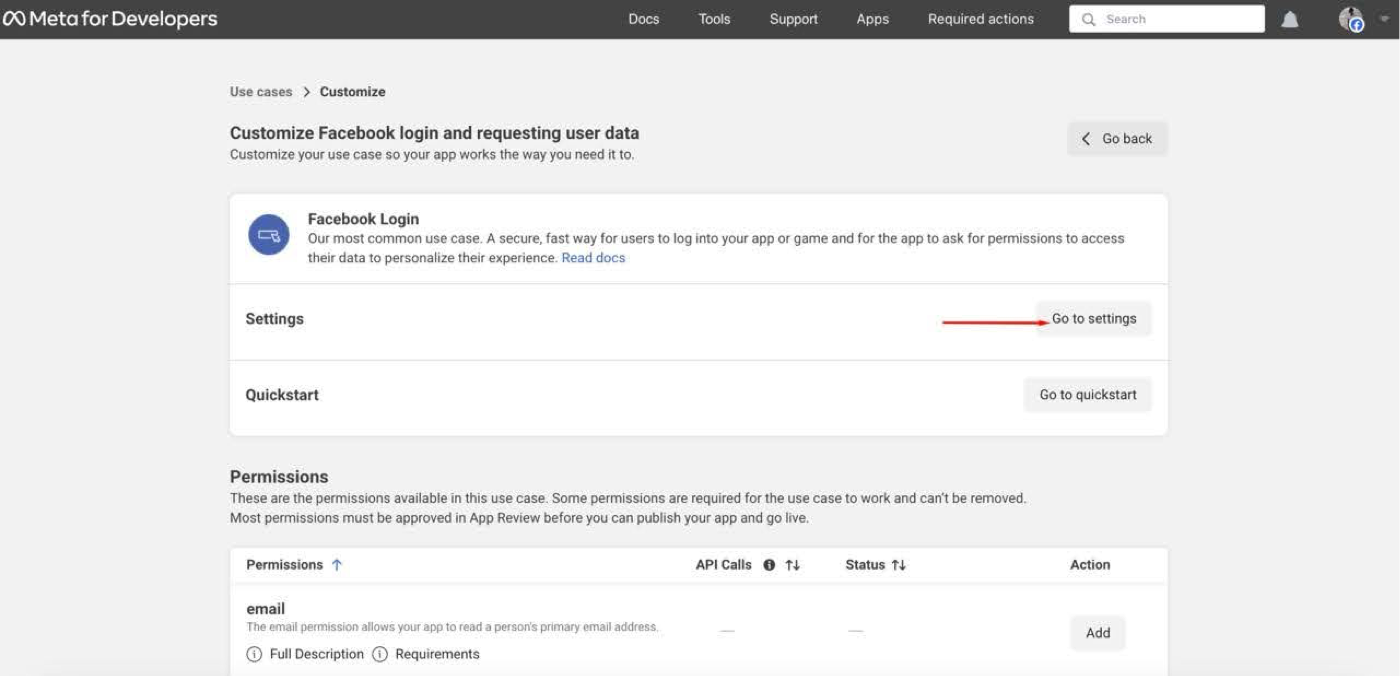
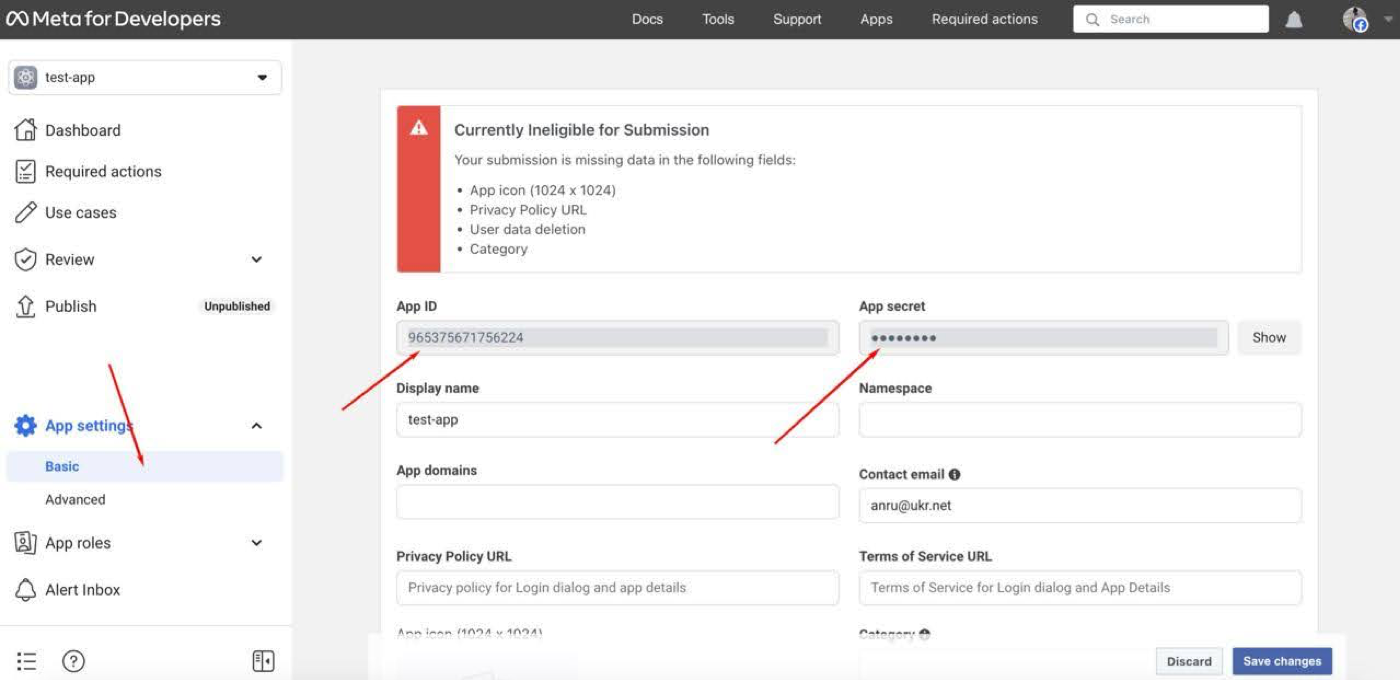
Get API Keys: After configuring the application, you will be able to find the API keys in the application settings section. Facebook will provide you with client and secret keys, which you will need to use in your web application for authentication through Facebook.
After obtaining the API keys from Facebook, we will be ready to proceed with integrating authentication via the Facebook provider into our web application using QuickBlox UIKit for React.
Step 3: Adding Parameters in the QuickBlox Admin Panel for Our Application
To successfully integrate authentication via the Facebook provider into our web application using QuickBlox UIKit for React, we need to set the corresponding parameters in the administrative panel of our QuickBlox application. In this section, we will go through the steps to add parameters in the QuickBlox admin panel.
- Logging into the QuickBlox Admin Panel: Log in to your QuickBlox account through a web browser and navigate to the administrative panel.
- Selecting the Created Application: After logging into the admin panel, choose the application you created, to which you want to add parameters for authentication via Facebook.
- Accessing Application Parameters: Inside the selected application, find the section for application settings or parameters. It is usually labeled as “Settings” or “Parameters”.
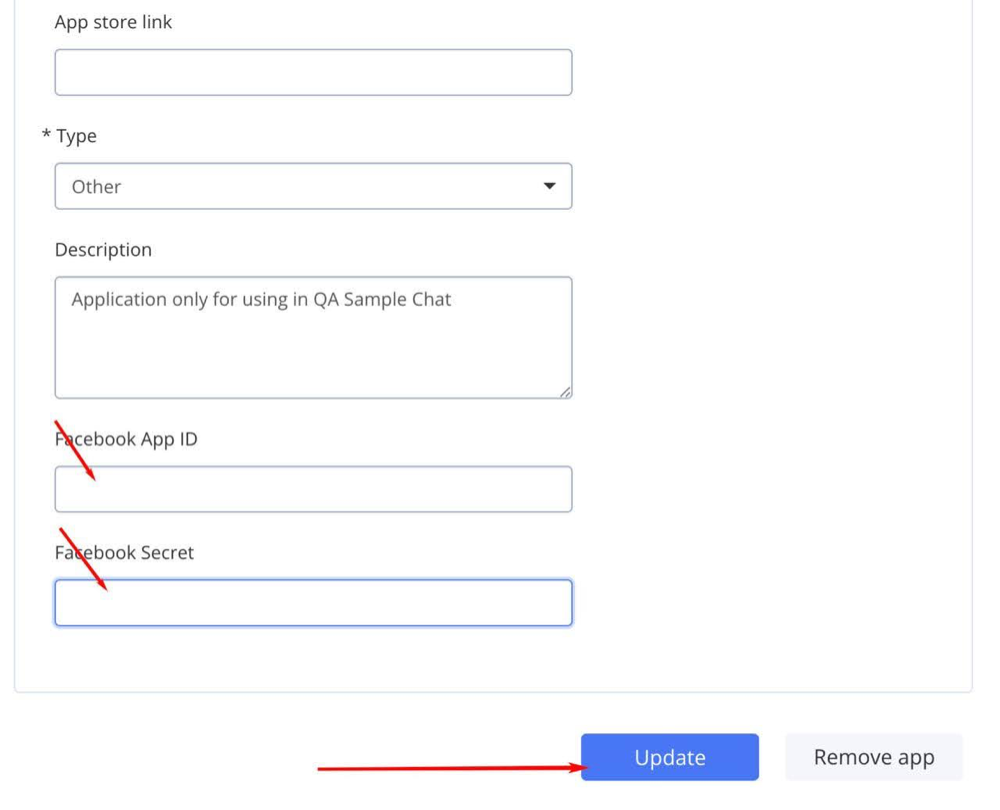
- Setting Facebook App ID and Facebook Secret: In the application parameters section, locate the corresponding fields for setting the Facebook App ID and Facebook Secret. Enter the values you obtained when creating the application on Facebook.
- Saving Changes: After you have set the values for Facebook App ID and Facebook Secret, remember to save the changes to make them take effect.
After completing these steps, QuickBlox will be ready to use the Facebook API keys for user authentication in your web application. Now we can proceed to integrate authentication via the Facebook provider into our web application using QuickBlox UIKit for React.
Step 4: Implementing Facebook Authentication in the QuickBlox UIKit for React Demo Example
Connecting Facebook SDK
First, you need to connect the Facebook SDK to your application. This can be done by adding the SDK to the index.html file of your application or by dynamically loading the SDK in a React component.
In the public/index.html file, add the following code before the closing body tag:
  <script>
  window.fbAsyncInit = function() {
    FB.init({
      appId: 'YOUR_Facebook_APP_ID',//  CHANGE YOUR_Facebook_APP_ID to ID your FB app
      autoLogAppEvents : true,
      xfbml            : true,
      version          : 'v10.0'
    });
  };

  (function(d, s, id){
     var js, fjs = d.getElementsByTagName(s)[0];
     if (d.getElementById(id)) {return;}
     js = d.createElement(s); js.id = id;
     js.src = "https://connect.facebook.net/en_US/sdk.js";
     fjs.parentNode.insertBefore(js, fjs);
   }(document, 'script', 'facebook-jssdk'));
  </script>
Adding the FB.login Method Call in the src\QBHelpers.tsx file
In the src\QBHelpers.tsx file, add the FB.login method call to perform authentication via Facebook:
export const createUserSessionWithFB = async (): Promise => {
    return new Promise((resolve, reject) => {
        window.FB.login((response: any) => {
            if (response.authResponse) {
                const accessToken = response.authResponse.accessToken;
                QB.createSession({
                    provider: "facebook",
                    keys:{
                        token: accessToken,
                        secret: null
                    }
                }, async (errorCreateSession: any, session: any) => {
                    if (errorCreateSession) {
                        reject(errorCreateSession)
                    } else {
                        const userId: number = session.user_id;
                        const password: string = session.token;
                        const paramsConnect: ParamsConnect = { userId, password };
                        resolve(paramsConnect);
                    }
                });
            } else {
                reject("Error! User canceled login or did not fully authorize.");
            }
        }, {scope: 'email'});
    });
};
Adding Methods in the Main App Component
In the App component, add methods to perform authentication operations via Facebook:
const loginFBHandler = async (): Promise => {
    if (isOnline) {
        setErrorMessage('');
        await loginFBAction();
    } else {
        setErrorMessage('Error! No connection.')
    }
};

const loginFBAction = async (): Promise => {
    if (isSDKInitialized && !isUserAuthorized) {
        await createUserSessionWithFB()
            .then( async resultUserSession => {
                await connectToChatServer(
                    resultUserSession,
                    currentUser.login)
                    .then( async authData => {
                        await qbUIKitContext.authorize(authData);
                        qbUIKitContext.setSubscribeOnSessionExpiredListener(() => {
                            console.timeLog('call OnSessionExpiredListener ... start')
                            logoutUIKitHandler();
                            console.log('OnSessionExpiredListener ... end');
                        });
                        setSDKInitialized(true);
                        setUserAuthorized(true);
                        document.documentElement.setAttribute('data-theme', theme);
                        navigate('/');
 })
                    .catch( errorChatConnection => {
                        handleError(errorChatConnection);
                    });
            })
            .catch( errorUserSession => {
                handleError(errorUserSession);
            });
    }
};
Adding a Handler for the Button in the SignIn Component
In the SignIn component, add a button for authentication via Facebook and a handler for the click event on this button:
<Button
    size='small'
    fullWidth
    variant="contained"
    sx={{mt: 3, mb: 2}}
    onClick={signInFBHandler}
    disabled={!isOnline}
>
    Login with Facebook
</Button>
Passing the loginFBHandler Method to the SignIn Component
In the src/App.tsx file, pass the loginFBHandler method to all calls of the SignIn component:
  <SignIn
    signInHandler={loginHandler}
    signInFBHandler={loginFBHandler}
    errorMessage={errorMessage}
    isOnline={isOnline}
/>
After completing all the steps, your web application using Quickblox React UIKit will be ready to perform authentication via Facebook. Let’s run our application and see the result.
Conclusion
Well done! If you successfully followed the steps you should have now added
authentication via Facebook to your web application using QuickBlox UIKit for React.
From a security perspective, we did briefly discuss the option of using a custom proxy server to interact with the Facebook API. This approach allows hiding sensitive data, such as the Facebook application secret key, from end users, and adds additional layers of access control and authentication. However, we will leave a detailed discussion of this topic for a future article on our blog.
We hope that this article has been helpful to you and will assist you in successfully implementing authentication in your projects. Stay tuned to our blog for updates on security and other aspects of web application development.
If you have questions, ideas or just want support consider joining our Discord Developer community!
Have Questions? Need Support?
Join the QuickBlox Developer Discord Community, where you can share ideas, learn about our software, & get support.
Join QuickBlox Discord